

Hidden water leak signs include musty odors, peeling paint, warped floors, unexplained meter movement, and fresh ceiling stains. These clues signal moisture where it shouldn’t be and call for quick checks to limit mold and structural damage. If more than one sign appears, investigate promptly and arrange professional leak detection in Westlake Village.
Worried a small stain or smell means trouble at your place in Westlake Village? This guide explains how to read the clues, test with simple tools, and decide when to call Westlake Village Plumbing for skilled leak detection and repair.
Table of Contents
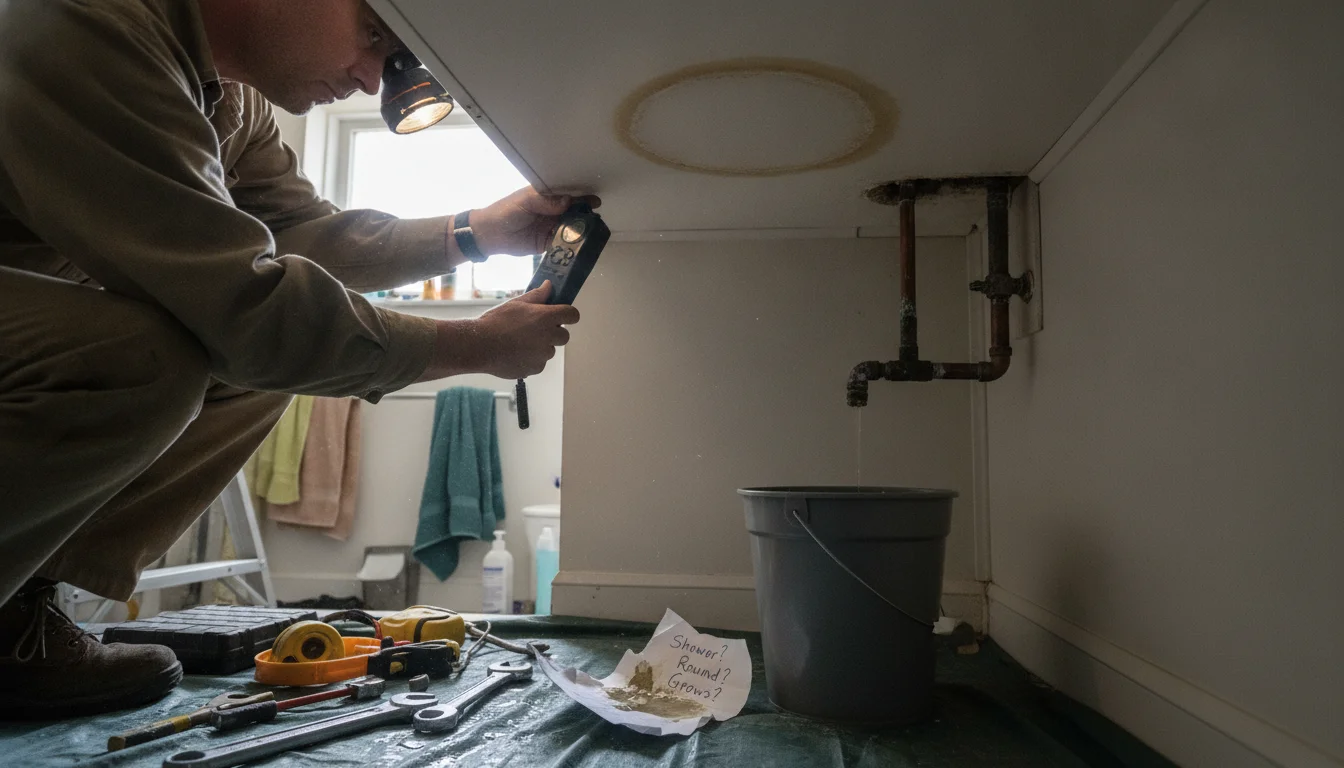
- What are hidden water leak signs, and why do they matter?
- How can you tell there’s a leak behind a wall?
- What hidden water leak signs show up under floors?
- Are ceiling stains the only warning of a leak above?
- Which sounds and smells point to a concealed leak?
- Can your water bill or meter confirm a hidden leak?
- What health and safety risks come with hidden moisture?
- Which DIY tools and tests help locate hidden moisture?
- When should you call a licensed plumber—and what will they do?
- How do you prevent hidden leaks and limit water damage long-term?
- Frequently Asked Questions
- Key takeaways
- Conclusion
What are hidden water leak signs, and why do they matter?
Hidden leaks are water losses you cannot spot at a glance. They develop in wall cavities, beneath floors, above ceilings, and under slabs. Early hints include damp, musty odors, bubbling or peeling paint, darkened patches, distorted wood, and a spinning water meter when no fixtures are on. These signals point to active water movement and need timely attention.
A hidden leak is any water escape from pipes, valves, or fixtures that doesn’t show at the surface right away. It can be gradual, like a tiny pinhole in copper, or abrupt, like a split supply line. Slow moisture soaks building components: drywall softens, insulation stores dampness, and wood swells—inviting mold and decay.
Seemingly small issues compound because water follows gravity and wicks through porous materials, often traveling far from the source. A tiny drip might stain a baseboard, loosen tile, or trip a GFCI. Hidden leaks commonly present as a pattern—perhaps a musty hallway closet, a warm zone on a slab, or a fresh line in paint. Track patterns rather than chasing a one-off spot.
Why it matters: once materials get wet, damage accelerates. Mold can colonize damp drywall within 24–48 hours. Studs lose strength, floors deform, and wiring corrodes. What could be a small fix can balloon into opening walls, prolonged drying, and broader reconstruction. Acting early keeps the repair contained.
If you suspect a leak at your home or business in Westlake Village, document what you see and run a quick meter test. If results suggest flow, bring in a licensed pro. Westlake Village Plumbing supports Westlake Village with emergency plumbing, targeted leak detection, and durable pipe repair that addresses the source.
What counts as a hidden leak and its early signals
Hidden problems include pinholes in supply lines, worn valve stems, cracked fittings, condensation on cold lines that wets surrounding areas, and drain seepage at joints. Subtle clues show up first: a faint mark that grows, paint that bubbles again after drying, grout that never fully lightens, or edges of flooring that start lifting.
How small leaks escalate into major damage
Moisture weakens adhesives, feeds mold, and corrodes fasteners. Left alone, minor blemishes shift into structural repairs that take longer and cost more to put right. Early detection limits disruption and helps protect indoor air quality.
How can you tell there’s a leak behind a wall?
Wall leaks often telegraph on surfaces. Watch for paint that lifts or blisters, drywall that bulges or softens to the touch, and faint tan or brown rings. Baseboards may swell or separate. In tiled bathrooms, grout may darken and remain damp long after a shower.
Touch and compare temperatures. Cool, clammy spots can suggest evaporative cooling from moisture inside the cavity. Gently press drywall; if it dents easily, the interior may be wet. Run a clean, dry tissue along baseboard seams—damp fibers signal a problem. Note if marks expand after a shower or washing machine cycle; timing helps pinpoint the source route.
Rule out surface condensation. In humid rooms, cold-water lines may sweat and drip onto drywall, mimicking a leak. Increase ventilation and monitor. If the area doesn’t dry, a concealed leak is more likely.
Use your ears too. A faint hiss can indicate a pressurized supply leak; drips may echo in hollow walls. Turn off nearby fixtures and listen closely. Mark any location where the sound is notable.
Visual and tactile clues on drywall and paint
- Bubbling or peeling paint that returns after drying
- Soft drywall that dents with light finger pressure
- Linear stains that track along studs or seams
- Swollen baseboards or gaps at shoe molding
- Persistent grout discoloration near tub surrounds
Simple shutoff and meter checks for wall leaks
Do a quick test:
- Turn off all fixtures and appliances that use water.
- Note the water meter reading; many meters have a small leak dial that turns with tiny flows.
- Wait 20–30 minutes with no water use.
- Recheck the meter. Any movement indicates flow.
- To isolate, close the main house valve. If the meter still moves, the leak lies between the meter and the house. If it stops, the problem is inside.
If the meter shows movement only when a particular valve is open (for instance, the cold side to a bath), the issue may be on that specific run. Share your observations with a licensed plumber to speed diagnosis.
What hidden water leak signs show up under floors?
Flooring hides a lot of early moisture clues. Water beneath hardwood often makes boards cup or crown, with gaps opening between planks and finishes cracking. Tile can loosen, grout can crumble, and hairline cracks can spread. With vinyl or laminate, edges may bubble or lift. A spongy or hollow feel underfoot signals trouble below.
On a concrete slab, a warm spot can indicate a hot-water line leak, while a persistently cool, damp patch can suggest a cold line issue. In quiet rooms, you might hear faint running or ticking. Doors that suddenly stick may reflect swelling in the subfloor. Rugs can feel damp at the edges without a visible spill.
In kitchens, dishwashers and fridges with supply lines are frequent sources. In bathrooms, a failed toilet wax ring can leak slowly and soak the subfloor. Water often follows joists, so visible damage may show up one room over from the actual source. If you know the floor framing direction, compare that to the spread of symptoms.
Crawlspaces tell the unvarnished truth. Under the suspect area, use a light to check for drips on the underside of the subfloor, wet insulation, and fresh mineral trails on pipes. Work carefully, avoid wiring, and be mindful of standing water.
Hardwood, tile, and slab indicators
- Hardwood cupping or crowning that does not flatten with dry weather
- Loose or hollow-sounding tile and cracking grout lines
- Vinyl or laminate bubbles near sinks or dishwashers
- Warm or cool spots on slabs that align with likely pipe runs
Radiant heat and crawlspace red flags
Hydronic radiant heat leaks may appear as uneven warmth, frequent boiler top-ups, or fresh slab discoloration. In crawlspaces, look for active drips, rust at metal hangers, and damp insulation batts. Any of these signs call for prompt inspection to prevent mold and rot.
Are ceiling stains the only warning of a leak above?
Ceiling stains are common, but other precursors can appear first. Sagging drywall, bubbling paint, and seams telegraphing through are frequent early cues. You may notice nail pops or fine cracks that spread. In bathrooms, peeling around the ceiling vent can reflect trapped humidity—or a nearby slow leak.
Water may pool above before it shows below. Press gently with a knuckle near a stain; if it feels soft, the cavity may be wet. Don’t puncture without preparation—water can release rapidly. If you must relieve pressure, place a bucket first to avoid a collapse.
Track timing to separate roof issues from plumbing leaks. New marks after storms often point to roofing or flashing. Stains that expand after showers or laundry cycles implicate plumbing. Time and pattern are key.
In multi-story homes, inspect the room above the stain. Look under tubs, around toilets, and near laundry machines. A loose supply, worn gasket, or failed caulk can let water in. Persistent drips—even tiny ones—create wide stains below over time.
Sagging drywall, bubbling paint, and seam lines
- Sagging or pillowy drywall suggests pooling overhead
- Paint bubbles that reappear soon after drying
- Sharp seam lines where joint tape lifts or splits
- Rust on ceiling fixtures like fan housings or recessed lights
Attic clues and telling roof vs. plumbing leaks apart
In attics, look for dark, damp decking, rusty nails, or wet insulation. Roof leaks often leave trails from high to low points. Plumbing leaks typically appear near vent stacks or beneath bathrooms. If the stain is round and expands after bathing, plumbing is likely; if it follows rafters and shows after rain, suspect the roof.
Which sounds and smells point to a concealed leak?
Your nose and ears do a lot of the early detection work. A sudden musty odor in a closet, bathroom, or under a sink can be the first sign—“musty” often means mold digesting wet material. If odors intensify after running a shower or washer, focus on those lines. Smells that persist after thorough cleaning point to hidden moisture.
Listen for dripping, hissing, or a running-water hum when all fixtures are off. Drips can echo inside walls; steady hissing often means a pressurized supply leak. A faint whoosh near a slab can point to a broken line under concrete.
Be cautious not to confuse drain odors with fresh water leaks. Sewer gas has a sulfur-like note and ties to vent or trap issues rather than supply lines. However, a failed wax ring can leak both water and gas—both need prompt attention.
Visible mold may appear as speckles on paint, dark patches along caulk lines, or fuzzy growth on drywall. Even hidden mold can release spores and volatile organic compounds (VOCs)—gases from molds and damp materials that irritate eyes and lungs. Reducing moisture at the source is essential.
Dripping, hissing, and running-water noises
- Dripping within walls or ceilings after fixtures are shut off
- Steady hissing from pressurized line leaks
- A running-water hum at the meter when no water is being used
Musty odors, mold growth, and VOCs
A persistent musty odor, sporadic headaches that ease outdoors, or visible mold spots connect back to hidden dampness. Air out the space, fix the water source, and dry materials thoroughly to halt growth.
Can your water bill or meter confirm a hidden leak?
Yes. Your water meter is a reliable truth teller. With no water running, the meter should be still. If it moves, water is flowing somewhere. Many meters feature a small leak indicator dial that spins even with tiny flows; a slow, steady turn suggests a constant, small leak.
Bills also reveal patterns. Look for month-to-month usage rises without explanation. Seasonal changes can shift totals—summer irrigation, for example—but winter spikes indoors are a red flag. Compare similar months year over year when possible to filter out seasonal watering.
Meters help isolate issues, too. Close shutoffs to suspect fixtures and watch the indicator. If it stops, that branch likely has a problem. Toilets are frequent culprits, followed by hose bibs, ice maker lines, and water heaters.
Step-by-step water meter test
- Turn off all indoor and outdoor water use.
- Locate the small leak dial on the meter and note its position.
- Wait 20–30 minutes with no water use.
- Recheck the dial. Any motion means water is moving.
- To confirm, close the main valve to the home. If the meter still moves, the leak is in the service line between meter and home; if it stops, the leak is somewhere inside.
Reading bill patterns and seasonal usage
Scan for unexplained spikes when no guests, appliances, or irrigation changes occurred. Tie higher use to known events where possible. If consumption stays high across seasons without a clear reason, a hidden leak is likely. Share bills and notes with your plumber—usage history speeds up the find.
What health and safety risks come with hidden moisture?
Hidden moisture harms buildings and people alike. Mold thrives on damp drywall and wood, potentially triggering allergies, worsening asthma, and irritating eyes and skin. Children, older adults, and those with respiratory conditions often feel effects first. Keeping structures dry is the key preventive step.
Indoor air quality declines when mold grows or materials remain wet. Odors linger, and VOCs from damp materials and mold add to the burden. Fresh air helps, but stopping the water and drying the structure are what restore conditions. Fans alone won’t solve it if the leak continues.
Wet areas raise slip hazards as well. Water on tile or vinyl may be hard to see until someone steps and slides. Towels are only a stopgap—source control is essential.
Water and electricity are a dangerous mix. Moisture near outlets, junction boxes, or fixtures can cause shorts or shocks. If you suspect water intrusion near power, switch off the circuit at the breaker and get a professional to inspect before restoring power.
Over time, wood rot and corrosion weaken supports. Joists, subfloors, and studs can lose strength, while metal hangers and nails corrode. Quick drying and targeted repair reduce the chance of broad structural work later.
Mold exposure, allergens, and indoor air quality
- Allergy flare-ups and musty odors after water use
- Visible mold or dark staining on walls or ceilings
- Persistently high humidity that doesn’t improve with ventilation
Electrical hazards, rot, and slip risks
If you notice water near outlets or light fixtures, shut off power to that circuit. Use care on wet floors. Arrange professional leak detection, drying, and safe repairs to restore the area.
Which DIY tools and tests help locate hidden moisture?
Homeowners can perform a few safe checks. A basic moisture meter can scan drywall, baseboards, and trim; readings that spike higher than elsewhere mark likely wet zones. A simple infrared thermometer can show cooler spots from evaporation or warmer zones above hot-water leaks.
Toilet dye tests are quick. A few drops of food coloring or a dye tablet in the tank will reveal a leaking flapper if color appears in the bowl without a flush. You can also set dry salt paper (plain tissue with table salt) at baseboards; salt that clumps signals moisture wicking along a path.
A full system pressure test should be handled by a licensed plumber using a gauge and pump. DIY pressure work risks over-pressurizing lines and causing new failures—leave that to pros.
Thermal imagers are useful but require interpretation. Cold air drafts can mimic wet areas. Always confirm cold or warm anomalies with a moisture meter. Scan, mark, and compare to known dry zones for a clearer picture.
Moisture meters and basic infrared checks
- Moisture meter: compare suspect areas to confirmed dry locations
- Infrared thermometer: identify hot or cool anomalies along probable pipe routes
Dye tablets, pressure tests, and salt paper
- Toilet dye test: fast check for silent leaks
- Salt paper at trim: simple wicking indicator
- Pressure testing: ask a licensed plumber for accurate, safe results
When should you call a licensed plumber—and what will they do?
Call a licensed plumber when you see more than one symptom, observe meter movement while all fixtures are off, notice active drips, detect ceiling bulges, or encounter odors that won’t clear. Call immediately if water nears electrical components, a floor sags, or a pipe bursts. Waiting raises repair complexity.
Expect a few targeted questions: when you first noticed the issue, what changes when fixtures run, and what your meter tests show. Photos and notes shorten the search.
Pros use minimally invasive methods. Acoustic listening helps track leak noises in walls. Thermal imaging maps temperature changes. Moisture mapping shows how far water has spread. For slab leaks, line tracing and pressure isolation narrow the target area. Occasionally, a small, precise opening confirms the source.
Repair strategy fits the cause. Pinholes in copper are cut out and replaced; brittle sections may be repiped. Depending on code and need, PEX or copper may be chosen. Drain problems can require rebuilding joints or traps. After repairs, air movers and dehumidifiers dry materials to safe moisture levels before closing.
Service options include Emergency Plumbing for urgent bursts, Leaks & Burst Pipes for detection and repair, and Water Heater Repair when hot-water lines or tanks leak. For appliance safety concerns, Gas Line Plumbing ensures code-compliant work.
Urgent thresholds and decision points
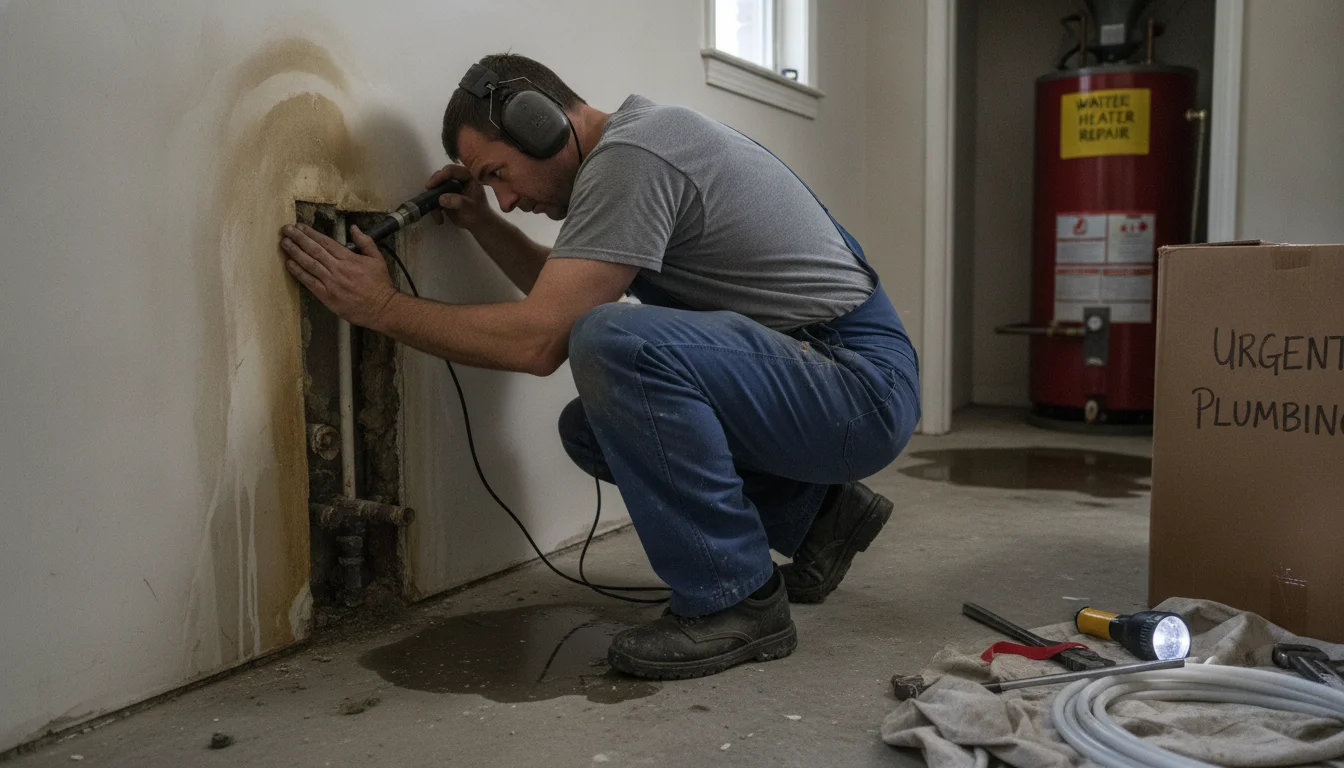
- Any ceiling sag or active drip: urgent
- Meter spins with all fixtures off: call soon
- Water near outlets or panels: cut power and call now
Professional leak detection methods and repairs
Expect non-invasive tools first, targeted openings only when required, and a clear, step-by-step repair plan. Pros verify the fix with follow-up testing before closing walls or ceilings.
How do you prevent hidden leaks and limit water damage long-term?
Prevention is a routine, not a one-time task. Look under sinks monthly and feel for dampness. Inspect around toilets, tubs, and showers. Watch for slow drains that might force water into places it shouldn’t go. Replace brittle supply lines with braided stainless hoses, and add shutoff valves where they’re missing.
Keep water pressure within a safe range because excessive pressure strains pipes and fixtures. A plumber can test it and install a pressure-reducing valve if needed. Insulate pipes in unconditioned spaces to reduce winter burst risk. Seal penetrations at walls and floors to limit condensation on cold lines.
Choose better materials during updates. Use quality valves, fittings, and approved pipe types. Set water heaters to safe temperatures to protect plumbing and reduce scald risk, and service heaters per manufacturer guidance to help prevent tank leaks. If your property has known problem pipe materials, plan a repipe before leaks force the timing.
Document issues for insurance. Take clear photos of damage, meter dials, and repairs. Keep receipts. Know where the main shutoff is and make sure everyone in the home can operate it. Build a simple burst-response plan: shut water, move valuables, and call for help.
Maintenance checklist and better material choices
- Monthly checks under sinks and at water-fed appliances
- Annual inspection of supply lines, shutoff valves, and water heater
- Replace worn hoses with braided stainless
- Insulate pipes in attics, crawlspaces, and exterior walls
Insurance documentation and emergency readiness
Keep a folder with photos, notes, and timelines. Mark the main shutoff. Store towels, a flashlight, and a basic tool kit in one spot. Quick, organized action limits damage.
Frequently Asked Questions
What should I do first if I find a new ceiling stain?
Turn off water to fixtures above the stain if possible. Set a bucket under any sag. Avoid poking holes without a plan. Run a quick meter test to check for flow. If the stain grows or the meter shows movement, call a licensed plumber for leak detection.
How can I tell if a toilet is leaking without tools?
Place a few drops of food coloring or a dye tablet in the tank. Wait 10–15 minutes without flushing. If color appears in the bowl, the flapper leaks. Silent toilet leaks are common hidden water leak signs and can raise your bill.
Are musty odors always from a water leak?
Not always. High humidity, poor ventilation, or aging carpet can smell musty. But a new musty odor near walls, closets, or baths often points to hidden dampness. Use a moisture meter on trim and drywall to compare readings. If they run high, investigate further.
Can a water heater cause hidden leaks?
Yes. Tanks can seep at fittings, valves, or the tank body. Small leaks may drain into a pan and go unnoticed. Watch for rust marks, damp pans, or clicking sounds. Water Heater Repair can address tank or connection issues before they become major damage.
Who should I call for a burst pipe emergency?
Reach out to a licensed plumber offering Emergency Plumbing service. Shut off the main water valve first, then open a faucet to relieve pressure. Move items away from the leak. Pros can stop the water, restore service, and begin drying to protect your property.
Key takeaways
- Early clues matter: stains, smells, sounds, and meter movement all point to hidden leaks.
- Simple tests help: shutoffs and meter checks can confirm concealed flow.
- Act fast: quick response limits mold, rot, and structural repairs.
- Pros have tools: non-invasive detection narrows the source with minimal damage.
- Prevention works: routine checks, quality materials, and clear emergency plans reduce risk.
Conclusion
Hidden leaks start small but can damage your Westlake Village property quickly. Use the guidance here to spot early warning signs, run simple tests, and decide when to bring in a licensed expert. Westlake Village Plumbing serves Westlake Village homes and businesses with targeted leak detection and repair that addresses the source and safeguards your structure. Contact us.
If you are not sure which of these you are dealing with, it is worth having someone look at it before it turns into a bigger job. Get in touch with Westlake Village Plumbing today and we will tell you where you stand.